
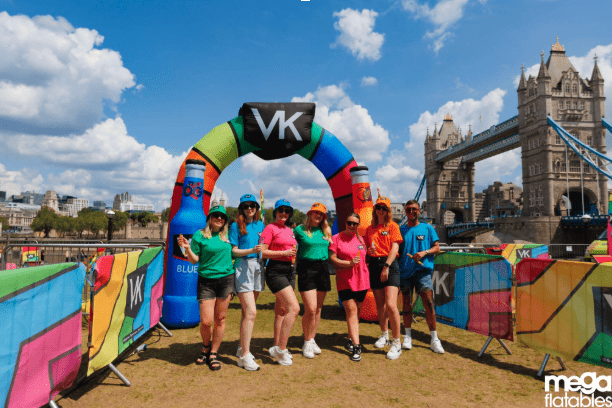
Whether you are organising a 10,000-runner charity marathon in London or a local fun run through a village park, an inflatable arch sets the tone before a single participant crosses the line. It frames the event, carries your branding, and creates the kind of photo-worthy focal point that ends up across social media within minutes. But getting from “we need an arch” to a fully installed, perfectly branded structure on event morning requires careful planning.
This guide walks you through every decision you need to make when deciding how to plan an inflatable arch for your event, from choosing the right width and height to coordinating delivery logistics with your venue. It is written for first-time buyers and experienced event managers alike, drawing on over a decade of experience manufacturing and installing inflatable arches across the UK and internationally.
Why Do Inflatable Arches Work for Events?
Inflatable arches are the standard marker for start and finish lines at running events, cycling races, and triathlons across the UK. The London Marathon, Parkrun events, Race for Life, and hundreds of brand-sponsored 5Ks all use them. But their application extends well beyond sport. Brand activation teams use arches as entrance features at festivals and exhibitions. Charities use them to create visible rally points for sponsored walks. Retailers position them outside stores for launch events and seasonal promotions.
The practical appeal is clear. An inflatable arch is lightweight, packs down into a carry bag, inflates in minutes, and provides a large, highly visible surface area for full-colour printed branding. Unlike rigid metal or wooden structures, there are no sharp edges, no complex assembly, and no requirement for specialist rigging crews. A single blower unit keeps the arch inflated continuously throughout your event.
How Do I Choose the Right Inflatable Arch Size?
Inflatable arch sizing is the first and most consequential decision in your planning process. The wrong size creates bottlenecks for runners, looks disproportionate in photos, or simply does not fit your venue. Here is how to approach inflatable arch sizing with confidence.
Standard Width Options
Most UK inflatable arch suppliers offer widths from approximately 10ft (3m) up to 30ft (9m) or larger for custom builds. Here is how each range typically works:
- 10ft to 15ft (3m to 4.5m): Ideal for single-lane entrances, indoor exhibitions, retail doorways, and smaller charity events.
- 18ft to 20ft (5.5m to 6m): The most popular size for community fun runs, Parkrun-style events, and mid-scale brand activations.
- 25ft to 30ft (7.5m to 9m): Suited to large-scale road races, cycling events, and major festival entrances where vehicle access or wide crowd flow is needed.
If your event requires something beyond 30ft, bespoke manufacturing at Megaflatables can accommodate virtually any span.
Height and Curvature Considerations
Arch height is typically proportional to width, but you have options. A standard round arch creates a semicircular profile where the clearance height at the centre is roughly half the span width. For a 20ft-wide round arch, expect a central clearance height of approximately 10ft (3m).
If you need greater overhead clearance to allow vehicles, tall banners, or camera gantries to pass underneath, a squared-off or angular arch design provides a flatter top profile with taller side legs. This gives you more usable height across the full width rather than only at the centre point.
Always measure your venue ceiling height if installing indoors. For outdoor events, consider whether timing equipment, camera rigs, or overhead banners need to fit beneath the arch and factor that into your height specification.
What Do I Need to Know About Inflatable Arch Setup?
Understanding setup requirements before your event day eliminates surprises. This inflatable arch setup guide covers the essentials from power to anchoring.
Power Requirements
Continuously inflated arches require a constant power supply to a blower unit. A standard arch blower draws between 500W and 1,500W, depending on the arch size. You will need:
- A standard UK 240V mains supply within cable reach, or
- A portable generator for remote outdoor locations
Some arches, particularly sealed air or cold air designs, inflate once and hold their shape without continuous power. These are useful for locations where running a blower for several hours is impractical, but they are less common for large event arches.
Anchoring and Stability
Every inflatable arch must be securely anchored. Anchoring methods depend on the surface:
- Grass or soft ground: Heavy-duty metal stakes driven at least 30cm into the ground, attached to anchor loops sewn into the arch base.
- Tarmac, concrete, or hard surfaces: Sandbags or water ballast bags positioned over the base tubes. For a 20ft arch in moderate wind, you should allow a minimum of 25kg of ballast per anchor point, with four to six anchor points being typical.
- Indoor venues: Sandbags or weighted base plates. Stakes are obviously not an option on exhibition hall floors, so ensure you have sufficient ballast weight available before the event.
Wind loading increases dramatically with arch size. A 30ft arch presents a significant sail area, and inadequate anchoring is the single most common cause of inflatable arch failures at UK events. Always follow the manufacturer’s anchoring guidelines to the letter and err on the side of over-anchoring rather than under-anchoring.
Setup Time and Crew
A typical inflatable arch can be unpacked, positioned, connected to a blower, and fully inflated within 15 to 30 minutes by two people. Larger arches or complex multi-arch configurations may require 30 to 60 minutes and a crew of three or four. If you are commissioning a supplier like Megaflatables to handle inflatable arch delivery and installation, setup is managed entirely by experienced technicians who will arrive with all necessary equipment.
For self-setup, request a full briefing or video walkthrough from your supplier before event day. Practice inflating and positioning the arch at least once if possible, particularly if your team has not handled inflatables before.
Indoor vs Outdoor Use: Planning for Your Venue
The venue environment shapes several planning decisions. Here is what to factor in for each setting.
Outdoor Event Arch Planning
Most inflatable arches in the UK are deployed outdoors, which means weather is a primary concern. Quality inflatable arches are manufactured from PVC or nylon or. They can handle rain without issue, and most are designed to operate in winds up to approximately 20 to 24 mph.
For inflatable start finish arches in the UK, being used at events held between October and March, rain and wind are near certainties. Check the Met Office forecast 48 hours before your event and have a contingency plan. Your contingency should include a designated person responsible for monitoring conditions and deflating the arch quickly if wind speeds exceed safe limits.
Ground conditions also matter. Saturated ground after heavy rainfall reduces stake-holding capacity. If your venue is prone to waterlogging, consider using longer stakes or supplementing with ballast bags even on grass.
Indoor Event Arch Planning
Indoor arches eliminate weather concerns but introduce different constraints. Measure the exact ceiling height, doorway dimensions for getting the packed arch into the venue, and floor space available for the arch footprint, including the spread of the base tubes. A 20ft arch requires a floor footprint of roughly 20ft wide by 3ft to 4ft deep, plus clearance behind for the blower unit.
Blower noise can be a factor indoors. In a quiet exhibition hall or corporate conference venue, the continuous hum of a blower is noticeable. If noise is a concern, ask your supplier about low-noise blower options or sealed air arches that do not require continuous inflation.
Branding and Print Considerations
An inflatable arch is a branding vehicle first and foremost. The arch surface provides prime real estate for sponsor logos, event names, hashtags, and campaign messaging. Full-colour dye sublimation printing is the industry standard, producing vibrant, weather-resistant graphics that will not peel, crack, or fade during your event.
When planning your artwork:
- Position key logos and text on the front-facing surface at eye level or slightly above, where cameras and spectators naturally look.
- If the arch will be seen from both sides (common for start/finish arches), ensure both faces carry appropriate branding.
- Allow adequate production lead time. Bespoke printed arches typically require two to four weeks from artwork approval to delivery, depending on the manufacturer’s schedule.
Megaflatables offers a full bespoke design service, including 3D visual mockups, so you can see exactly how your branded arch will look before production begins. This is invaluable for getting sign-off from sponsors and stakeholders.
Coordinating Delivery and Event Day Logistics
Getting the arch to your venue at the right time is as important as the arch itself. Poor logistics planning is a common pitfall for first-time event organisers.
Delivery and Access
A packed inflatable arch for a 20ft span typically weighs between 15kg and 30kg and fits into one or two large holdall-style bags. The blower unit adds another 10kg to 15kg. This is manageable in a large car boot or van, but for larger arches or multi-arch setups, a van or dedicated delivery vehicle is essential.
Confirm vehicle access to your setup point. Many UK park venues, for example, restrict vehicle access to specific time windows or designated routes. If your arch installation point is 400 metres from the nearest vehicle drop-off, you need to plan how to transport the equipment on foot or by trolley.
Timing Your Setup
Build your event timeline backwards from the start time. If your race begins at 09:00, your arch should be fully inflated, anchored, and branded by 08:00 at the latest to allow time for timing equipment installation, photography, and any last-minute adjustments. That means your setup crew should be on site by 07:00 to 07:30.
For events with separate start and finish arches at different locations, stagger your setup schedule and ensure you have sufficient crew and equipment at both sites. If you are using a supplier-managed installation, confirm the arrival time in writing at least one week before the event.
Post-Event Breakdown
Deflation is faster than inflation. Once the blower is switched off, the arch will deflate within a few minutes. Allow 15 to 20 minutes to disconnect, fold, and pack the arch back into its bags. Ensure the fabric is dry before long-term storage to prevent mold. If it rained during your event, unpack and air-dry the arch within 24 hours.
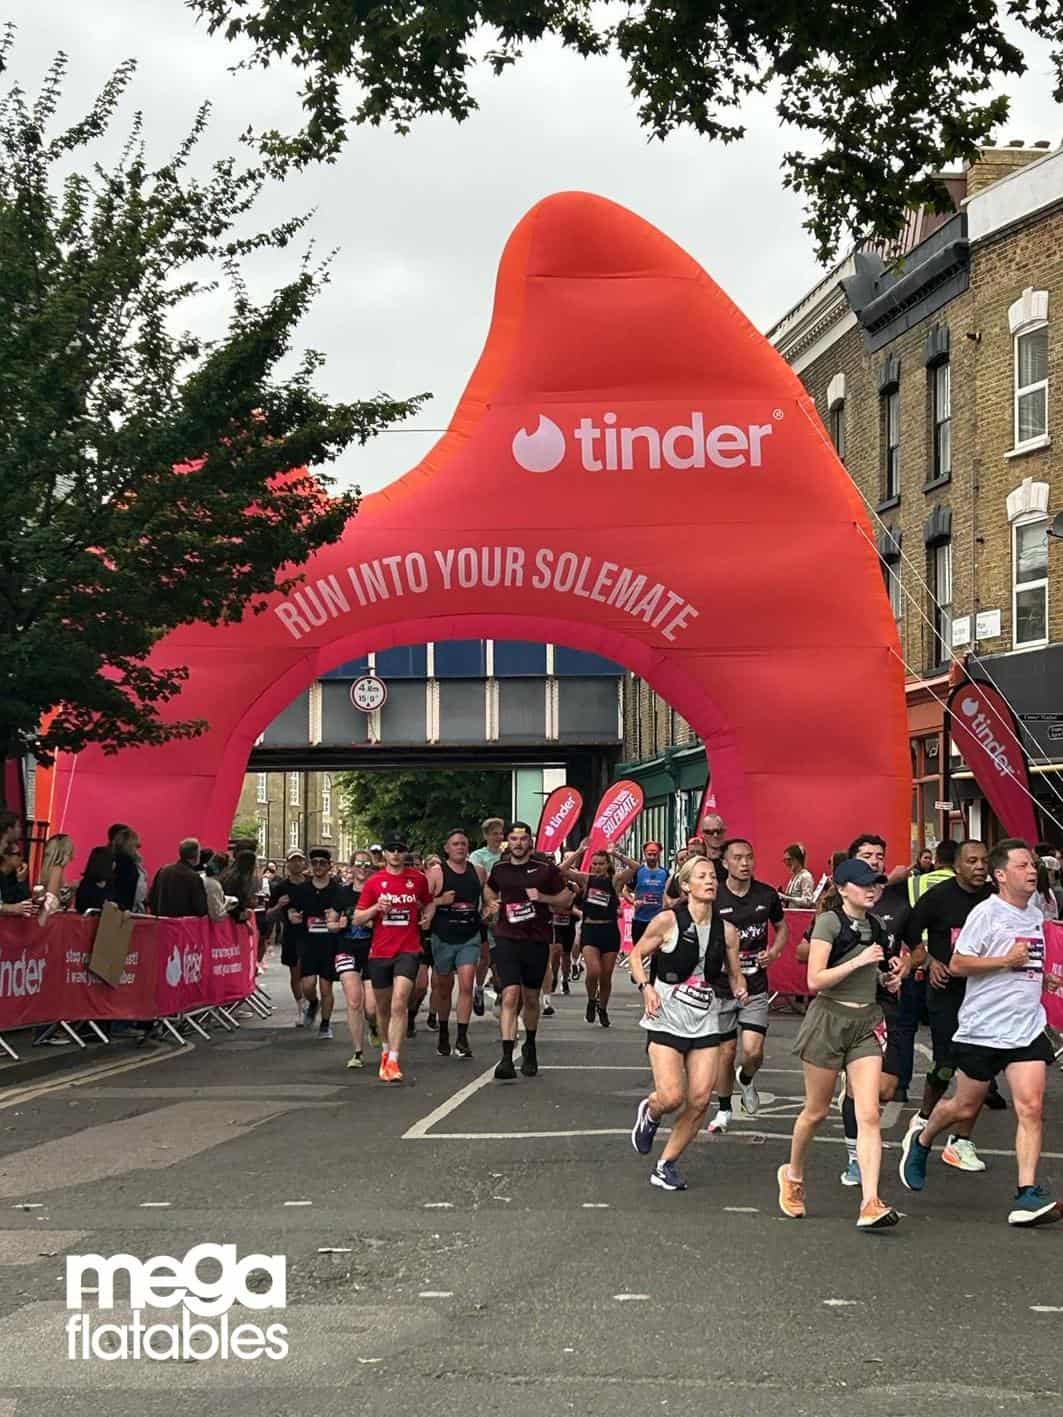
Checklist for How to Plan an Inflatable Arch for Your Event
Use this checklist to keep your event arch planning on track:
- Confirm venue dimensions, including width at the installation point and ceiling height if indoors.
- Select arch width based on expected crowd flow and venue constraints.
- Determine anchoring method based on ground surface type.
- Confirm power supply availability or arrange generator hire.
- Confirm delivery logistics, vehicle access, and setup timing.
- Designate a responsible person for weather monitoring on event day.
- Brief your setup crew or confirm supplier installation arrangements.
- Plan post-event breakdown and storage.
Get a Quote for a Custom Inflatable Arch
If you are planning a running event, charity walk, cycling race, brand activation, or any occasion that calls for a professional inflatable arch, Megaflatables can take you from initial concept to installed arch on event day. With over 300 five-star Google reviews and a client list including Nike, Google, Disney, and hundreds of UK charities and sports organisations, we bring the experience and manufacturing capability to deliver exactly what your event needs.
Get a quote for a custom inflatable arch tailored to your event dimensions, branding requirements, and budget. Our team will provide a 3D visual mock up, handle production, and coordinate delivery or full installation anywhere in the UK.